Fix My Speaker
Premium Tool to Clean & Restore Speakers
0%
MODE
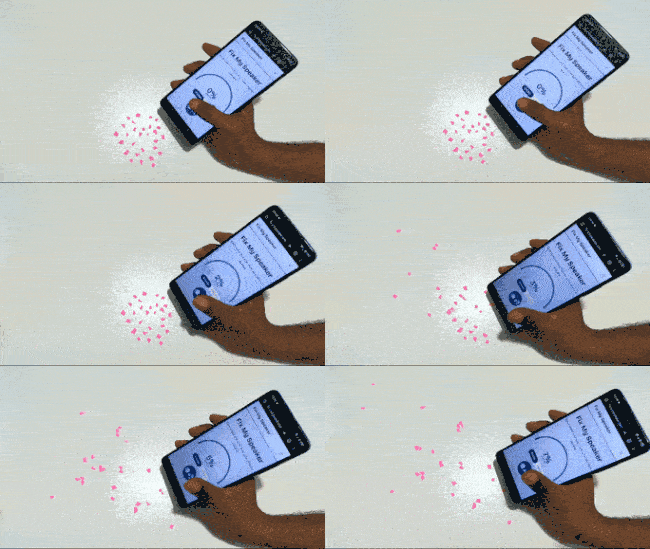
Even the most advanced smartphones and portable speakers can fall victim to water, dust, and distortion problems that can ruin your listening experience. If your calls sound muffled or your music has lost its punch, you’re not alone. No wonder you are screaming “fix my speaker”.
Clear, crisp audio is essential, and fixing it doesn’t have to mean a costly repair. Today’s online speaker-fixing tools use targeted sound waves and vibrations to restore performance in minutes.
Among them, Fix My Speaker delivers fast, reliable results you can try right from your device.
Its precision sound frequencies, dual-mode operation, and safe water ejection technology make it a trusted choice for restoring speaker clarity.
Let’s explore how you can bring your sound back to life today.
Why Is My Speaker Sound Distorted?

When your speaker sounds rough or unclear, distortion is likely the cause. Distortion happens when the sound coming out is no longer a clean copy of the original audio.
Before knowing how to remove water from speaker sound, let’s learn about the related mechanical, electrical, or acoustic issues inside the speaker.
1. Drive Unit Distortion
Your speaker’s woofer, tweeter, and midrange drivers each create some distortion. These parts move using an electromagnetic motor system, which is never perfectly linear.
High currents, heat, and strong movement can disrupt the magnetic field, adding unwanted noise.
2. Magnetic Circuit Limitations
The magnet and metal frame around the voice coil are not perfectly balanced. When power levels rise, the magnetic field shifts. This shift alters how the coil moves. It creates extra sound artifacts you do not want.
3. Voice Coil Movement Issues
As the coil moves, it generates its own electrical current. This current interacts with the existing magnetic field. The result is interference that slightly changes how the cone moves, leading to distortion.
4. Cone and Suspension Resonance
The cone, dust cap, rubber surround, and spider suspension all vibrate. They rarely move in perfect sync with the input signal. These vibrations create resonances at certain frequencies, coloring the sound.
5. Cabinet Vibrations
The speaker box can also distort sound. Even stiff materials like concrete have a natural resonance. These vibrations add tones that were not in the original recording.
6. Crossover Component Distortion
The crossover directs bass to the woofer and treble to the tweeter. Its resistors, capacitors, and inductors each add tiny amounts of distortion. While small compared to driver distortion, it still affects clarity.
What is Fix My Speaker?
Fix My Speaker is a simple web tool that uses specially crafted audio tones to clear dust, moisture, and debris from your device’s speaker.
You don’t install anything. Just launch it in your browser. It plays oscillating sounds across frequencies like sweep tones, bass tones, midrange, and treble to shake loose stuck particles and moisture.
You set your device speaker downward, crank the volume up, then run the tool in manual or auto modes to begin cleaning.
It uses square or triangular waveforms rather than standard sine waves to boost effectiveness.
If you are struggling with fixing my speaker shortcut for iPhones and Android phones, the tool works for both. It offers a safe, fast way to restore clear audio performance.
How Can You Use Fix My Speaker to Fix Your Distorted Speaker Online?

You can clear distortion in minutes. Run Fix My Speaker cleaner in your browser. It uses sound and vibration to eject water and dust.
Step 1. Prepare Your Device
Before starting, remove any phone case or accessory blocking the speaker. Wipe your device gently with a dry, lint-free cloth to remove visible moisture and prevent further seepage.
Step 2. Maximize Volume Output
Set your device’s volume to maximum to ensure the cleaning frequencies have enough power to dislodge particles and moisture effectively. This enhances the sound wave impact on your speaker diaphragm.
Step 3. Initiate Sound Wave Mode
Select the Sound option on Fix My Speaker. This mode emits controlled high- to low-frequency tones that push out water droplets and loosen trapped dust. Allow the cycle to reach 100% completion.
Step 4. Activate Vibration Mode
Switch to the Vibrate mode for mechanical shaking of your device’s internal components. This helps remove stubborn particles or residual moisture left behind after the sound wave process.
Step 5. Test Audio Performance
Play a clean audio track, such as spoken voice or instrumental music, to check clarity. If distortion remains, repeat both sound and vibration modes 2–3 times for optimal results. This speaker dust cleaning sound process helps restore crisp, clear audio.
Step 6. Take Additional Care if Needed
If your phone was exposed to saltwater or heavy liquid damage, seek professional cleaning to prevent corrosion and long-term speaker damage.
How Does Fix My Speaker Work?
Our system works by generating controlled sound waves and vibration patterns that interact directly with your speaker’s diaphragm.
These audio signals sweep through a range of frequencies, from low bass pulses to high treble oscillations, creating precise air pressure changes inside the speaker enclosure.
The rapid diaphragm movement dislodges water droplets, dust particles, and fine debris trapped in the mesh or behind the grille.
In vibration mode, mechanical resonance intensifies this effect, shaking loose stubborn contaminants without physical contact. Both processes rely on calibrated waveforms to avoid damaging delicate components while restoring an unobstructed sound path.
This method uses acoustic energy, not invasive tools. It ensures a safe yet highly effective cleaning cycle, and you will get the right way on how to fix my speaker on my iPhone and Android as well.
Why Do You Need to Clean Your Phone Speakers from Water and Dust?
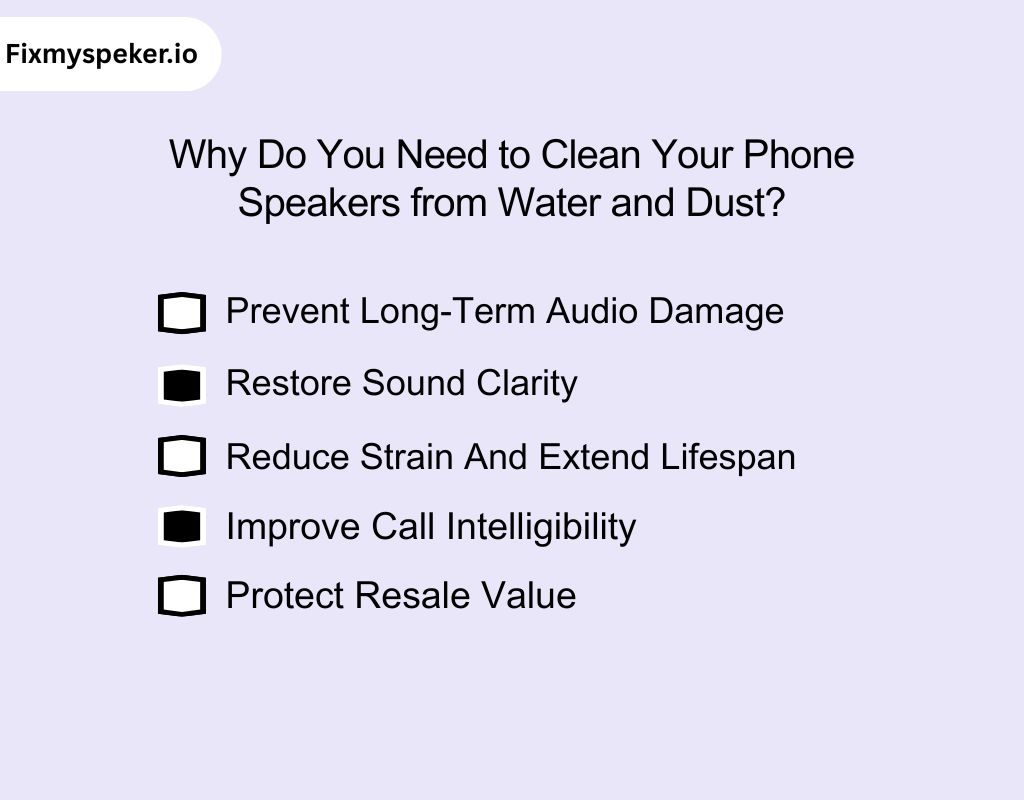
You rely on clean, accurate audio for calls, music, and alerts. Water and dust reduce clarity and strain components, so regular cleaning matters.
1. Prevent Long-Term Audio Damage
Moisture corrodes metal and wicks into coils. You stop progressive damage by clearing residue before it bonds to internal parts. This keeps drivers operating within design tolerances.
2. Restore Sound Clarity
Dust blocks the mesh and narrows airflow. You remove acoustic obstacles, so voices and music regain definition. Transient details and highs return without harshness.
3. Reduce Strain And Extend Lifespan
Obstructions force the diaphragm to work harder. You cut mechanical load by clearing the path. Lower heat and stress prolong service life and reduce failure risk.
4. Improve Call Intelligibility
Water films and lint mask speech frequencies. You clear the receiver path and recover voice clarity. Conversations become natural without straining to hear.
5. Protect Resale Value
Buyers judge devices by audio quality. You present a clean, functional speaker that passes quick tests. Document recent maintenance to justify stronger pricing.
What’s the Science Behind the Sound Wave Tool for Water Removal?
Speaker sound tools for water removal apply core principles of acoustics and fluid dynamics. They use controlled sound frequencies to create physical effects that push moisture out of the speaker.
If you wonder how can I fix my phone speaker without opening it, these tools provide a safe, non-invasive option.
1. Acoustic Pressure Fluctuations
High-intensity sound waves create rapid pressure variations in the air around the diaphragm. These shifts produce miniature air currents that push water droplets toward the speaker outlet.
2. Diaphragm Resonance
When the tool plays certain frequencies, it drives the diaphragm into resonant motion. This targeted vibration increases displacement force, shaking moisture loose from behind the mesh.
3. Frequency Sweeping
The tool cycles through a full spectrum of tones. Lower frequencies move heavier droplets, while higher frequencies target fine mist trapped deeper in the grille.
Many users search for fix my speaker water solutions, and this method delivers targeted moisture removal without damaging the device.
4. Capillary Disruption
Water clings to surfaces through surface tension in small gaps. Focused vibrations break this bond, allowing droplets to move freely toward the exit.
5. Non-Contact Drying
Because only sound and vibration are applied, there is no risk of scratching, puncturing, or stressing delicate speaker components.
If you think about fix my speaker wire, remember that this method is for moisture removal, not hardware repair.
Features & Benefits of Our Speaker Tool You Should Know About
Our advanced speaker cleaning platform combines precision technology with safe, effective methods. Every feature is designed to protect your device, and every benefit delivers measurable improvements in sound quality and reliability.
If you’ve been searching for fix my speaking solutions, this tool offers a fast and reliable way to restore clear audio.
Features of Our Speaker Tool
1. Dual Cleaning Technologies
Our tool uses both sound wave output and vibration resonance. This combination clears particles and moisture from different depths inside the speaker assembly.
2. Specialized Cleaning Modes
You can select modes for dust removal, water ejection, volume restoration, bass recalibration, and mic or ear speaker cleaning. Each mode runs frequencies tuned for its exact purpose.
3. Brand and Device-Specific Tools
The tool works with Apple devices, laptops, smartphones, earbuds, and Bluetooth speakers. It includes dedicated water eject options for iPhone 11, 12 Essentials, and 13.
If you need to fix my phone speaker after water exposure, these targeted modes make the process quick and safe.
4. Broad Frequency Spectrum
It produces tones from deep bass to high treble. Each range targets specific particle sizes, moisture behavior, and speaker construction.
5. Instant, Browser-Based Operation
You can launch it in any modern browser without downloads. This gives immediate access across devices with no impact on storage or speed.
6. Precision Waveform Engineering
It runs controlled waveforms and alternating patterns. These maintain high cleaning power while protecting diaphragms, mesh, and other sensitive parts.
If you’re looking to fix my speaker sound, this approach clears obstructions without risking damage.
Benefits of Using Our Tool
Clear, Distortion-Free Sound
Using our tool removes dust, moisture, and debris from the sound path. You hear precise tones, balanced frequencies, and clean voice playback at every volume level.
Long-Term Speaker Reliability
Our cleaning process protects delicate components from gradual damage. Routine use maintains diaphragm flexibility, coil alignment, and mesh integrity for years of consistent performance.
Maximum Volume Preservation
By clearing airflow obstructions, our tool restores full diaphragm movement. You keep maximum loudness stable and distortion-free, even during demanding playback.
If you’ve been trying to fix my speaker volume, this method brings back clear, powerful sound.
Reduced Repair Expenses
Preventive cleaning with our tool stops buildup from causing costly damage. You avoid unnecessary part replacements and maintain peak performance without high service fees.
Safe, Non-Contact Cleaning
Our system applies only calibrated sound waves and vibration patterns. No physical contact means zero risk to membranes, mesh, or internal wiring.
Immediate Maintenance Access
Our browser-based platform launches instantly. You can start cleaning the moment muffling, distortion, or volume loss occurs, avoiding downtime and service delays.
If you need to fix my call speaker dust, this tool removes debris quickly without opening your device.
Common Speaker Challenges You Can Fix with Our Speaker Cleaner Tool?
Speaker performance can be affected by water, dust, or distortion over time. Our advanced sound wave and vibration-based cleaning technology helps address these common issues quickly and effectively.
1. Dust Build-Up in Speakers
Over time, dust can accumulate inside the speaker grills, reducing audio clarity. The tool’s targeted sound frequencies dislodge dust particles, restoring crisp and vibrant sound without manual cleaning.
2. Water Trapped in Speaker Components
Accidental splashes or immersion can cause muffled audio. Using precision sound waves, the tool helps eject trapped water, minimizing damage and improving overall audio quality.
3. Distorted or Low Volume Output
Debris and moisture can muffle sound or reduce volume. The cleaning modes remove obstructions, allowing the speaker to produce fuller and louder audio again.
4. Blocked Ear or Mic Speakers
Smaller speaker openings like ear or mic components are prone to blockages. The tool’s gentle yet effective frequencies clear these delicate areas without risk of damage.
5. iPhone Speaker Water Damage
Water damage in iPhone speakers can cause permanent issues if left untreated. Our cleaning process helps expel water quickly, reducing the risk of corrosion and distortion.
If you’re wondering how to fix the speaker on my iPhone, this method offers a fast, non-invasive solution.
6. Bass Distortion in Music Playback
When dust or water disrupts bass frequencies, music can sound flat or distorted. The cleaning tool restores the low-frequency response, enhancing depth and richness in audio playback.
If you’re searching for fix my speaker bass, this process brings back powerful, clear lows.
How to Clean Water from the Speaker?
Even minor water exposure can compromise your phone’s speaker, leading to distortion, corrosion, or complete failure. Acting quickly and correctly helps you protect both performance and longevity.
1. Power Down Immediately
Switch off your device the moment it gets wet to halt electrical current and prevent short circuits. This fast action can significantly reduce internal component damage.
2. Safely Remove Surface Moisture
Hold the device so gravity draws water away from the speaker, then blot gently with a lint-free microfiber cloth. Avoid pressing moisture deeper into the mesh.
3. Use Controlled Vacuum Extraction
With a handheld vacuum and narrow nozzle, apply gentle suction from a safe distance. This removes droplets without disturbing delicate speaker parts or seals.
4. Clear Residual Water via Sound Waves
Run a specialized tool like Fix My Speaker or namelix to emit precise frequencies that vibrate moisture out of the speaker chamber without risking further damage.
5. Dry Thoroughly with Silica Gel Packets
Place your phone in a sealed container surrounded by silica gel. This targeted method absorbs deep-seated moisture far more effectively than rice.
6. Allow Proper Air-Dry Time
Let your device sit for 48 hours in a cool, ventilated space, away from heat sources. This gradual drying prevents adhesive weakening and part warping.
7. Test for Audio Clarity
Play high-quality audio at a moderate volume to check for distortion or muffled tones. Any persistent issue may signal trapped moisture or damage.
8. Seek Professional Support if Needed
If performance remains compromised, consult a repair specialist for ultrasonic cleaning or advanced moisture removal techniques.
Popular Brand Speakers You Can Repair with Our Tool?
Modern speakers, no matter how premium, are not immune to damage from water, dust, or debris. Our advanced speaker cleaning technology is designed to target these issues and restore audio performance across leading global brands.
1. JBL
Known for its powerful bass and crisp audio, JBL speakers can lose clarity when moisture or dust infiltrates the driver components. Our tool uses precision sound waves to dislodge these obstructions, restoring the rich, dynamic output JBL is famous for.
2. Samsung
Samsung devices, from flagship phones to portable speakers, may experience muffled or distorted sound after flights, cold weather exposure, or environmental dust. Our cleaning process efficiently clears blockages and reinstates their signature balanced audio.
3. Vivo
Vivo smartphones often face speaker performance drops due to dust accumulation or accidental water splashes. Our method flushes out trapped particles and moisture, reviving their clean, detailed sound output.
4. Realme
Temperature fluctuations and everyday grime can degrade Realme speaker performance over time. By recalibrating the sound chamber and expelling unwanted debris, our tool ensures Realme devices maintain consistent, high-quality playback.
5. iPhone
iPhones are already well protected against water and dust damage. But due to the extreme conditions these phones are sometimes exposed there can be water damage and also damage from dust.
Our technology precisely ejects these intrusions, restoring premium sound quality without the need for hardware repairs. And you don’t even have to think about compatibility. You can just use our speaker cleaner from any browser.
If you’re trying to fix my speaker phone, this solution works quickly and safely.
6. Xiaomi
Xiaomi’s speaker ports and receiver meshes are susceptible to water retention and dust blockage. Our targeted cleaning process eliminates these issues, preserving volume strength and tonal clarity.
What Sets Us Apart from Other Speaker Tools?
Many speaker cleaning tools use generic tones and lack true precision. Fix My Speaker is built differently. Every feature is tuned to clean effectively, operate safely, and work seamlessly across devices.
1. Dual-Mode Cleaning Technology
We pair controlled sound wave output with synchronized vibration patterns. You remove moisture droplets, loosen embedded dust, and clear fine debris in one combined process. This dual approach addresses surface issues and deep obstructions in a single cycle.
2. Brand-Specific Optimization
Settings adjust automatically to the speaker design of your device. You get cleaning patterns tailored for JBL, Samsung, iPhone, Xiaomi, Realme, and Vivo. This prevents overdriving delicate diaphragms while still delivering full cleaning strength.
3. Real-Time Cleaning Progress
You see an active progress bar during every session. It tracks the entire cleaning cycle, so you know exactly when maximum effectiveness is reached. This removes the guesswork common with other tools.
The ear speaker cleaner sound feature makes it easy to target and clear delicate components.
4. Browser-Based Access
You start cleaning instantly in your browser with no downloads or installations. The system works on mobile and desktop, avoids storage use, and keeps your device free from unverified files.
5. Precision Frequency Engineering
We use frequency ranges tested through acoustic research. These tones and resonance points are chosen to push out trapped water and particles without stressing coils, membranes, or mesh.
This protects performance and extends your speaker’s lifespan.
What Are Other Popular Ways to Clean Speakers?
You can restore your speaker’s clarity using proven at-home techniques.
Each method below targets specific causes of distortion, from trapped dust to residual moisture.
1. The Rice Method (For Moisture Removal)
- Step 1: Immediately turn off your device and disconnect all accessories to prevent electrical damage.
- Step 2: Gently pat the exterior dry with a clean, lint-free cloth to remove surface water.
- Step 3: Fill a large airtight container with uncooked rice.
- Step 4: Bury the device completely in the rice so no part is exposed to air.
- Step 5: Seal the container and leave it for 24–48 hours to allow the rice to absorb internal moisture.
- Step 6: Remove the phone, clean away any rice dust with a microfiber cloth, and test the speaker.
2. The Silica Gel Method (For Faster Drying Than Rice)
- Step 1: Power down the device and, if possible, remove the SIM card and battery.
- Step 2: Lightly dry the exterior with a soft, absorbent cloth.
- Step 3: Place the phone in an airtight container surrounded by multiple silica gel packets.
- Step 4: Ensure the packets make close contact with all sides of the device.
- Step 5: Leave sealed for 24–48 hours to allow maximum moisture absorption.
- Step 6: Reassemble, power on, and test for improvements in sound clarity.
3. Soft-Bristle Brush Cleaning (For Surface Dust)
- Step 1: Use a clean, fine-bristle brush like an artist’s or makeup brush.
- Step 2: Hold the device at an angle so debris falls away instead of deeper inside.
- Step 3: Sweep in one direction across the mesh to lift loose particles.
- Step 4: Repeat until all visible dust is gone without pressing too hard.
4. Compressed Air Cleaning (For Dust in Tight Spaces)
- Step 1: Attach the straw nozzle to a can of compressed air.
- Step 2: Hold at a 45-degree angle, three inches away from the mesh.
- Step 3: Apply short, controlled bursts to avoid pushing debris inward.
- Step 4: Rotate the device and repeat as needed.
5. Adhesive Putty Dust Removal (For Stubborn Particles)
- Step 1: Soften a small piece of reusable adhesive putty in your hands.
- Step 2: Gently press it against the speaker grill, letting it mold into openings.
- Step 3: Lift slowly so dust and lint adhere to the putty.
- Step 4: Replace with clean putty as needed and repeat.
6. Rubbing Alcohol Cleaning (For Oil & Germ Removal)
- Step 1: Lightly dampen a cotton swab or microfiber cloth with isopropyl alcohol (70% or higher).
- Step 2: Gently dab or wipe the speaker grill without letting liquid seep inside.
- Step 3: Allow the alcohol to evaporate fully before powering on the device.
- Step 4: This method not only removes stubborn oils but also sanitizes the surface.
7. Vacuum with Precision Tip (For Deep Dust Removal)
- Step 1: Use a handheld vacuum with a narrow, soft-bristle attachment.
- Step 2: Set suction to the lowest setting to protect the mesh.
- Step 3: Glide the nozzle slowly over the grill.
- Step 4: Re-check for debris and re-pass stubborn areas gently.
Speaker Cleaning – Dust vs. Water Damage
Not all speaker problems share the same cause. Dust and water affect speakers in very different ways, so the cleaning methods you choose must match the issue. Using the wrong approach can worsen the damage.
| Aspect | Dust Cleaning | Water Damage Cleaning |
| Primary Goal | Remove dry particles (dust, lint, dirt) from speaker grills and ports. | Extract trapped moisture and prevent corrosion inside speaker components. |
| Key Methods | Soft-bristle brush, compressed air bursts at an angle, adhesive putty, microfiber cloth wipe. | Immediate power-off, gentle blotting, sound vibration tools, silica gel drying, controlled vacuum suction. |
| Common Tools | Brush, compressed air can, adhesive putty, microfiber cloth. | Silica gel packets, sound frequency tools, small vacuum nozzle, absorbent cloth. |
| Precautions | Avoid moisture-based cleaning to prevent introducing water damage or pushing dust deeper. | Avoid heat sources and pressing grills; do not power on until fully dry. |
| Typical Signs | Muffled or distorted sound without recent exposure to moisture. | Muffled audio after liquid exposure, crackling, or intermittent speaker function. |
Myths and Facts About Fixing Water-Damaged Speakers
When water gets into your phone or portable speaker, quick reactions can save it but only if you separate old wives’ tales from proven solutions.
Here’s the reality check you need.
Myths:
1. Loud Music Will Push the Water Out
Many believe cranking up the volume will force moisture out of the speaker grill. In reality, high-volume playback on wet components risks tearing the diaphragm and distorting the coil, often making the problem worse.
2. Rice Is a Guaranteed Fix
While rice does absorb moisture, it works slowly and can’t reach the moisture deep inside speaker chambers. It also leaves behind fine dust that can settle into ports and mesh.
3. Heat Is the Fastest Solution
Applying direct heat with hair dryers or heaters might seem smart, but rapid temperature spikes can warp delicate membranes, loosen adhesives, and drive moisture deeper into circuitry.
4. Air-Drying Alone Is Always Enough
Simply leaving the device out to “dry naturally” may allow surface moisture to evaporate, but trapped water inside the housing can linger for days, causing corrosion and hidden damage long after the device appears dry.
Facts:
1. Immediate Power Down Protects Internal Circuits
Turning your device off right away stops the electrical current and helps prevent short circuits. This is the single most important first step in any water damage incident.
2. Silica Gel Works More Efficiently Than Rice
Silica gel packets absorb moisture quickly and evenly, even from hard-to-reach areas. They also avoid the mess and contamination risks associated with rice.
3. Purpose-Built Tools Use Safe Sound Frequencies
Controlled audio tones at precise frequencies can gently vibrate water droplets out of your speaker. It is without stressing the membrane when used correctly with a dedicated cleaning tool.
4. Professional Restoration Delivers the Best Recovery Rates
Technicians use methods like controlled humidity drying, ultrasonic cleaning, and micro-suction to restore components safely. It is far more effective than guesswork at home.
Corrosion Prevention Is Critical
Even after moisture is removed, microscopic mineral deposits left by water can start corroding metal contacts. Professionals often use contact-safe cleaning agents to neutralize residues and stop long-term deterioration.
What to Do if Your Phone Falls in Water [Get Immediate Action Protocol]
Water intrusion can destroy delicate electronics within minutes. Immediate, precise action gives you the best chance to save your device. Follow this sequence without hesitation.
Step 1 – Shut Down Without Hesitation
Turn off your phone the moment it is retrieved from water. Active circuits exposed to moisture can short instantly, creating permanent board damage and accelerating corrosion inside microcomponents.
Step 2 – Strip All External Components
Remove the protective case, SIM card, microSD card, and any cables or connected accessories. This exposes vulnerable areas, reduces moisture retention, and allows faster ventilation for internal parts.
Step 3 – Extract Surface Moisture with Care
Use a lint-free, anti-static cloth to absorb visible water from every surface, including seams and port edges. Avoid shaking or blowing with your mouth—this can push liquid deeper into internal pathways.
Step 4 – Purge Liquid from Entry Points
Hold the device with its speaker and charging ports angled downward. Use short, controlled bursts from compressed air or an air blower to push liquid out, avoiding high pressure that may dislodge internal seals.
Step 5 – Initiate a Controlled Desiccation Process
Place the phone in an airtight container filled with industrial-grade silica gel packs. Leave it sealed for at least 24 hours. Silica’s rapid absorption pulls moisture from deep inside the circuitry without introducing dust or debris, unlike rice.
Step 6 – Execute Acoustic Water Ejection
Once the device is externally dry, use a specialized sound wave tool to target remaining water trapped in the speaker mesh, microphone openings, and internal chambers. Variable frequencies create micro-vibrations that push out stubborn droplets.
Step 7 – Power On with Caution
Only restart the device once you are certain it is fully dry internally. Test critical functions such as audio output, microphone clarity, and charging stability
DIY vs Professional Speaker Repair
A speaker problem can be a quick fix or a costly repair nightmare. Knowing which route to take protects both your audio quality and your wallet.
When to Choose DIY Repair
- Minor dust or water buildup is removable with cleaning modes or compressed air.
- Loose grille covers or external mesh cleaning without opening the device.
- Temporary sound distortion after humidity changes or outdoor use.
- Basic troubleshooting like volume calibration or running a water eject sound tool.
When to Choose Professional Repair
- Persistent distortion after multiple cleaning attempts.
- Visible damage to the cone, diaphragm, or voice coil.
- Electrical faults such as blown capacitors or crossover issues.
- Internal corrosion from saltwater or extended liquid exposure.
- Speaker driver misalignment is causing rattling or uneven sound output.
Preventive Measures to Avoid Water Damage
Moisture intrusion can degrade speaker performance and corrode internal parts. Adopting proven protective practices safeguards device integrity over the long term.
- Use a military-grade waterproof enclosure tested for ingress protection, particularly during fieldwork or high-risk environments.
- Apply precision-fitted silicone or rubber port seals to block microdroplets from entering acoustic chambers.
- Keep devices out of HVAC airflow paths where rapid temperature shifts can cause condensation inside speaker housings.
- Dry devices with a lint-free, anti-static cloth immediately after exposure to rain or accidental splashes.
- Store electronics in desiccant-lined containers when traveling to high-humidity regions.
- Avoid placing devices on cold metal or glass surfaces that can accelerate internal moisture buildup.
- Perform routine maintenance with compressed air to dislodge particles that can absorb and retain water inside mesh grills.
In Closing
Maintaining clear, distortion-free audio requires attention to both prevention and timely action. From understanding the causes of speaker issues to exploring effective cleaning methods, you now have the knowledge to protect and restore your device’s sound quality.
Modern tools make this process faster and safer than ever, without the need for technical expertise.
Fix My Speaker combines advanced frequency patterns with vibration technology to deliver results in minutes. Try it today and experience the difference in your audio performance.
Frequently Asked Questions
Why am I not able to hear voice in my phone during calls?
Moisture, debris, or mesh blockage can restrict audio transmission. In some cases, software glitches or proximity sensor faults may mute audio, requiring cleaning or targeted system troubleshooting.
How do I fix my speaker sound?
Identify the root cause, whether water, dust, or a hardware defect. Clean with precision tools, update firmware, and test with multiple audio sources before considering a hardware replacement.
How to reset phone speaker?
Restart your device, clear sound-related cache, and reset audio settings in system preferences. If the distortion persists, inspect for hardware interference or physical blockages.
How to clean a phone speaker?
Use a soft-bristled anti-static brush for the mesh surface. For internal cleaning, use controlled sound waves or professional-grade micro-vacuum tools to remove debris without damaging components.
How to increase volume on speaker?
Maximize in-app and system volume settings. Clean the speaker mesh to remove obstructions, then calibrate audio output in device settings for maximum clarity.
How to change volume without a button?
Use on-screen volume sliders, in-app controls, or accessibility settings. Many devices also allow volume control via connected headphones or Bluetooth accessories.
How to amplify a phone speaker?
Place the device in a concave surface or use an acoustic amplification dock. For a more precise boost, use external powered speakers or a certified portable amplifier.
What can I add to my speaker to make it louder?
You can connect an external amplifier or use an acoustic horn-style enclosure. These direct sound waves more effectively, increasing perceived loudness without altering the device’s hardware.
What device is used to amplify sound?
An audio amplifier boosts electrical audio signals to drive speakers at higher volumes. Portable Bluetooth amplifiers and docking stations are common solutions for personal devices.